How to Easily Transfer All Videos and Audio to Your iPod
Advertisement
Want to enjoy your favorite movies and playlists on the go? Whether you have an iPod classic, nano, shuffle, or touch, transferring videos and tracks doesn’t have to be overwhelming. Our step-by-step guide simplifies the process, covering everything from shifting formats to syncing with new software. Packed with clear instructions, tips, and troubleshooting advice, this guide will make loading your iPod effortless and stress-free.
Why Transferring Content to Your iPod Is Worth It
While streaming dominates most music and video consumption today, iPods continue to hold their ground as the go-to gadget for offline entertainment. There are several benefits to keeping your audiovisual content stored on your device:
- Offline access for uninterrupted listening and viewing anywhere
- Better battery life compared to phones running multiple apps
- No data or Wi-Fi required
- Dedicated media experience without distractions
Transferring content is a powerful way to personalize your music and video library, and it ensures you always have your favorites handy, no matter where you are.
Getting Started with Your iPod
Before you transfer anything, make sure you have everything set up:
- Your iPod (charged and ready)
- A USB to iPod cable
- The latest version of iTunes (Windows and older Macs) or the Finder app (macOS Catalina and beyond)
- The video and audio files you want to add
iPod Compatibility and Supported Formats
Every iPod generation supports specific audio and video formats. Here’s a quick breakdown:
- Audio: AAC, MP3, WAV, AIFF, Apple Lossless
- Video: .mp4, .m4v, .mov (iPod touch and classic with video support)
If you have files in other formats (like MKV, FLAC, or AVI), you’ll need to convert them before syncing. We’ll cover how below.
Step 1 - Organize and Prepare Your Media Files
Start by collecting all the audio and video files you want on your iPod. Place them in easy-to-find folders on your computer. If your files aren’t in iPod-supported formats, convert them first.
How to Convert Audio and Video Files
Plenty of free and paid converters exist. Here are a few popular options:
Using HandBrake to Convert Files
HandBrake is a free, open-source tool for converting audio and video files into iPod-compatible formats. Follow these steps to use it:
- Download and Install HandBrake: Visit the HandBrake website and download the version appropriate for your operating system. Install the software by following the on-screen instructions.
- Open HandBrake and Select a File: Launch HandBrake and click the “Open Source” button. Navigate to the file you want to convert and select it.
- Choose the Output Format: Under the “Preset” panel, select a preset compatible with your iPod. For most models, choosing an MP4 format with h.264 encoding works best.
- Adjust Settings if Needed: HandBrake allows you to adjust video resolution, audio tracks, and subtitles. These options can be found in the main interface tabs.
- Set the Destination: Click “Browse” to choose the folder where your converted file will be saved. Assign a file name to avoid overwriting other files.
- Start the Conversion: Once everything is set, click the “Start Encode” button. The conversion time will vary depending on the file size and your computer’s processing power.
How to Use MediaHuman Audio Converter
- Download and Install MediaHuman Audio Converter: Start by downloading the latest version of MediaHuman Audio Converter from the official website. Follow the installation steps provided to set up the software on your computer.
- Add Audio Files: Launch the program and click the “+” button or drag and drop your audio files into the application window. MediaHuman Audio Converter supports various formats, so you can import files in almost any audio format.
- Choose the Output Format: Click on the "Format" button located in the toolbar. From here, select your desired output format from the list (e.g., MP3, WAV, AAC). You can also adjust the quality settings, including bitrate and sample rate, according to your preference.
- Set the Destination Folder: Open the preferences menu by clicking on the gear icon in the top toolbar. Under the “Output” tab, specify the folder where you want the converted files to be saved.
- Start Conversion: Once your settings are finalized, click the “Convert” button in the main interface. The program will begin converting your files, and a progress bar will show the status of the conversion.
- Access Your Converted Files: After the conversion is complete, use the “Find Converted” button to quickly open the destination folder and access your converted audio files.
When converting, pick these settings for smooth playback on almost any iPod:
- Video: MP4 format, H.264 codec, 640x480 resolution, AAC audio track
- Audio: MP3 or AAC at 128-256kbps
Save converted files in a clearly labeled folder.
Step 2 - Add Your Files to iTunes or Finder
With your files ready, it’s time to add them to your media library.
For iTunes (Windows and Most Macs)
- Launch iTunes.
- Go to “File” > “Add Folder to Library” or “Add File to Library.”
- Select your prepared media folders or files.
- Double-check that your music and video appear in the correct sections of your library.
For Finder (macOS Catalina and Beyond)
- Open Finder and select your iPod under “Locations.”
- Drag and drop your files from their folders directly onto your iPod’s window.
- Or, click the “Music,” “Movies,” or relevant tab to manage your sync settings.
If your media doesn’t show the correct metadata (song title, album, cover art), you can edit these details in iTunes/Finder before syncing to keep everything organized on your iPod.
Step 3 - Connect and Sync Your iPod
Plug in your iPod using its USB cable and wait for it to show up in iTunes or Finder.
Automatic vs. Manual Sync
- Automatic Sync: Transfers your entire iTunes library or selected playlists every time you connect. Ideal for users who want seamless updates.
- Manual Sync: Lets you drag and drop individual audio and video files to your iPod’s icon. Perfect for those who want more control over their media.
Setting Up Automatic Sync
- Select your iPod in iTunes/Finder.
- Click the “Music” and “Movies” tabs.
- Choose “Sync Music” and/or “Sync Movies.”
- Select the playlists, artists, albums, or videos you want.
- Click “Apply” or “Sync.”
Setting Up Manual Sync
- Right-click your device’s icon and enable “Manually manage music and videos.”
- Drag files from your iTunes or Finder library directly onto the iPod.
Wait for the sync to complete and always eject your iPod safely before disconnecting.
Step 4 - Play Your Content on the Go
Once your content is synced, you’re ready to hit play. Here’s where to find everything:
- Audio: Go to Music > Songs, Artists, Albums, or Playlists.
- Videos: Find your movies or TV shows in the Videos or Movies app (or in the iPod Video section, depending on your device).
Explore your collection, create on-the-go playlists, and enjoy!
Troubleshooting Tips for Seamless Transfer
Even seasoned iPod users hit snags. Here are solutions to the most common issues:
- Files not showing: Confirm your files are in supported formats. Reconvert if needed.
- Sync errors: Update your iTunes or Finder, restart your iPod, and check your cable.
- Wrong metadata: Edit song and movie details in iTunes/Finder before syncing.
- Not enough space: Delete unused content from your iPod via iTunes/Finder to free up space.
For more complex problems, Apple’s official support offers detailed diagnostic tools based on your iPod model.
Smart Ways to Manage Your iPod Library
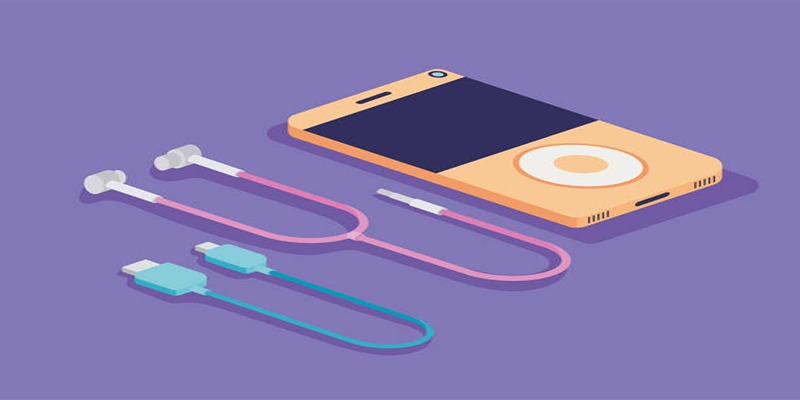
Maximize your iPod’s potential with these tips:
- Regularly update playlists: Keep your collection fresh by rotating in new tracks and videos.
- Tag everything: Use proper song, artist, and genre tags for easy navigation.
- Back up your library: Use iTunes or Finder to regularly back up your device.
Organized content makes for happier listening and viewing wherever you are.
Conclusion
Transferring audio and video to your iPod doesn’t have to be complicated. With the right tools and this guide, you can build the perfect entertainment collection for commuting, traveling, or relaxing at home. If you hit a snag, tap into the active iPod user community or explore online forums for tips, tricks, and playlist inspiration. Your iPod can become your ultimate media companion with just a little effort!
On this page
Why Transferring Content to Your iPod Is Worth It Getting Started with Your iPod iPod Compatibility and Supported Formats Step 1 - Organize and Prepare Your Media Files How to Convert Audio and Video Files Using HandBrake to Convert Files How to Use MediaHuman Audio Converter Step 2 - Add Your Files to iTunes or Finder For iTunes (Windows and Most Macs) For Finder (macOS Catalina and Beyond) Step 3 - Connect and Sync Your iPod Automatic vs. Manual Sync Setting Up Automatic Sync Setting Up Manual Sync Step 4 - Play Your Content on the Go Troubleshooting Tips for Seamless Transfer Smart Ways to Manage Your iPod Library ConclusionAdvertisement
Related Articles
How to Easily Transfer All Videos and Audio to Your iPod
The 6 Best Squarespace Alternatives in 2025 for Custom, Creative Web Design

Top 5 Ways to Automate Google Analytics for Better Efficiency

Simplifying Workflows with Online Document Editors

The 5 Best Hootsuite Alternatives in 2025 for Easier Social Media Management

Docusign vs. HelloSign (Now Dropbox Sign): Which is Best for Your Business
Top Trello Alternatives to Try in 2025 for Better Project Management
Top Dictation Software to Try in 2025 for Seamless Speech-to-Text Conversion

The 8 Best HubSpot Alternatives in 2025 for Smarter Growth and Less Hassle

Google Chat vs. Slack: Which Collaboration Tool Suits Your Business Best

The 9 Best Asana Alternatives in 2025 to Plan, Track, and Deliver Smarter
 lameuplay